You may have noticed that you’re wearing more kit these days. Gone are the sweltering summer months when, thanks to the minimal gear needed, you could be into your lycra and set to go before Clarke Kent could be into his favourite pants-on-the-outside spandex.
But now, and for the next few months, we have to wrestle with tights, skull caps, buffs and overshoes, all while attempting not to fall off the bed.
It’s a similar story with the bike which, just like you, needs a bit of extra dressing up for winter. Even a gravel bike.
If you’ve just spat your tea out at the thought of shelling out even more cash on a bike you were told was ‘perfect for winter’, I can only apologise.
The good news, though, is that kitting out your gravel bike for winter duties doesn’t have to cost the earth, but it will make a big difference to your riding experience in the cold weather.
Let’s go through the salient points.

(Image credit: Getty Images)
1. Brighten up: Lights
You might be tempted to ignore this on the basis that you have promised yourself that the dark evenings will be reserved only for evening meals, watching telly, and if you’re feeling especially energetic, a quick zip around Watopia.
The latest race content, interviews, features, reviews and expert buying guides, direct to your inbox!
Perfectly sane, many would say (although others would say you’d be missing out). But even if that is your stance, it’s well worth investing in a set of lights. It’s surprising, after all, how quickly the dark can draw in on a winter afternoon when it felt like you set out in plenty of time.
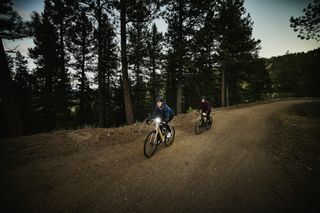
Many of us will have a rear light knocking around already, and it’s worth fitting one of these at any time you expect to riding on the road. But it’s the front that really matters if you’re out in the dark and away from the streetlights.
For a modest outlay you can buy a ‘get-you-home’ front unit that you can take on any PM rides, just in case the daylight does fail.
If a bit of twilight or even nighttime riding does tickle your fancy however, spend a bit more for power upwards of 1,200 lumens and decent battery life, add a helmet mounted auxiliary light if you can stretch to it, the darkness will hold zero issues.

(Image credit: Getty Images)
2. Get a grip: Tyres
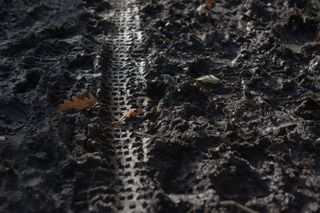
All summer you’ve been razzing around those dusty tracks, enjoying the speed and the easy grip of those small-knob three-season tyres. Unfortunately, it’s only going to take a few fast bends and a mouthful of mud to ascertain that for winter’s slippery sludge, new rubber is in order.
Sure, you could probably muddle through to March on the same set, tottering through every slippery corner like Bambi on ice and hoping for the best. Maybe you’d even stay upright.
Doesn’t sound too much like fun though.
For a modest outlay (yes, it’s that ‘modest outlay’ again, sorry), you could score yourself a set of aggressively knobbled tyres that are going to cling on for dear life in the bends and really allow you to enjoy your riding to the max.
If you’re only riding on the soft, off-roadiness of winter, and you don’t pull too many skids, they’ll probably get you through next winter too.
You can experiment with different tread patterns, but what you’re really looking for are shoulder knobs that will hook up in the bends. From there, the more your gravel riding will be slanted towards off-road, the knobblier you can go. Full-on aggressive knobs wear fast on tarmac and cornering grip is sub-optimal, so if you’re going to be taking on tarmac aplenty, opt for something with all-round ability.
Check out our gravel tyre reviews here.

(Image credit: Future)
3. Keep it clean: Mudguards / Fenders
Yes, your gravel bike in the summer looks sleek, cool and fast in all its naked, fender-less glory. But half an hour off-road in the winter and you and your bike are going to look more like a couple of bog monsters without some sort of protection.
Not cool. Not cool at all.
While mud may be likely to make your partner mad as hell when you tramp it through the house, at least it won’t wear out your parts, so to speak. The same unfortunately cannot be said for that lovely bike of yours, and the less you expose things like drivetrains and brakes to winter’s muddy grinding paste, the better.
If you’re planning on riding it mainly on tracks and trails this winter, this is easier said than done, as fitting a set of full length guards around a pair of fat gravel tyres can leave little in the way of mud clearance. If you intend to mostly ride on the road, or you run narrower (
For the rest of us, guards with less coverage are the obvious choice. They’re usually relatively simple to fit and, despite their apparent lack of protection, can do a very good job of keeping mud off both yourself and your bike.
Check out our reviews of the best mudguards / fenders for gravel bikes here.

(Image credit: Future)
4. Slip n slide: Chain lube
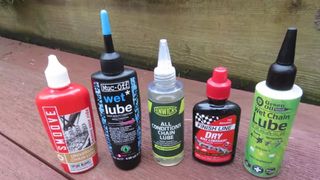
Chain lube is chain lube, right? Well, not quite. There are wet and there are dry lubes – named after the weather conditions they’re designed to perform best in. No prizes for guessing which you need for the British winter. (It’s wet, in case you were wondering).
Unlike dry lube, wet lube doesn’t dry onto the chain and it stands up well to rain and splashing. Sadly, that doesn’t mean you can just spray a load on at the beginning of November to see you through till March. Because wet lube is stickier it also attracts dirt, so you’re going to need to keep up with the maintenance.
There’s not actually a problem using wet lube all-year-round (this is what I do, but shh – don’t tell our Tech team). However, if you’re currently using a dry lube, which is easily washed off on wet, splashy rides, your bike will definitely thank you for switching to the wet stuff.
Check out our round-up of chain lubes here.

(Image credit: Getty Images)
5. Santé! Health check
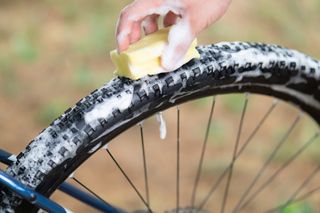
Think of this as the equivalent of a spring clean for your bike, but at the opposite end of the year. The changing of the seasons is the ideal opportunity to give your machine the once over, just to ensure it’s all set for three or four months of thrashing through the toughest conditions of the year.
Buy yourself some new cleaning utensils if necessary, in order that you can do the best job. Clean as usual, paying plenty of attention to the drivetrain. Then check your tyres, chain (you’ll need an inexpensive chain checker for this) and brake pads, and replace as necessary.
This is a great opportunity to upgrade to winter tyres (see above). You might also want to go for sintered brake pads, as their durability and stopping power will give them the edge over organic versions in winter. As for the chain, if it looks anywhere near being on the way out, get it replaced quick smart to save you the financial pain of having to replace the cassette with it due to wear.
And just like that, you’re set for winter. Obviously you’ll need the right clothing too (whole ‘nother article, I’m afraid), but your bike, at least is good to go. Enjoy!

